
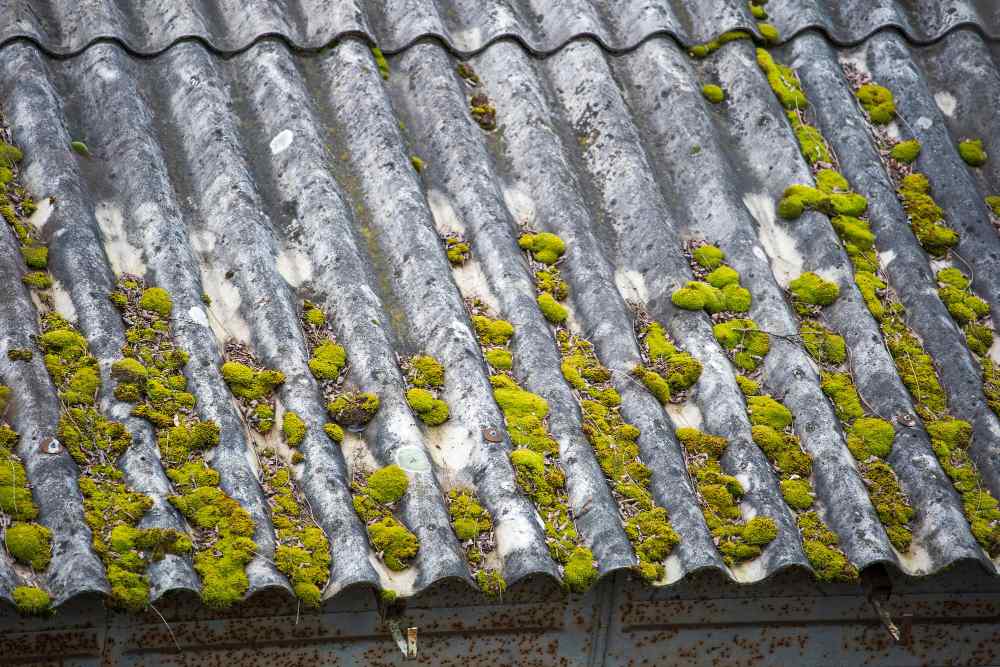
Removing moss from your roof is a crucial maintenance task that can extend your roof’s lifespan and improve your home’s appearance. Moss not only harms your roof’s appearance but also traps moisture, which can cause damage, leaks, and structural problems over time.
This guide offers clear, step-by-step instructions for safely and effectively removing moss, including methods, tools, safety tips, and ways to prevent moss from growing back.
Whether you’re a homeowner maintaining your property or a DIY enthusiast seeking advice, this guide gives you everything you need to remove moss quickly and effectively.
What is Roof Moss?
Moss is a simple, non-vascular plant that usually grows in damp, shady places, such as forests, gardens, and under trees. Unlike most plants, mosses don’t have true roots to take in water and nutrients. Instead, they possess tiny hair-like structures known as rhizoids, which help them cling to surfaces such as roof tiles, rocks, and other materials, as well as to soil.
Moss spreads by releasing spores into the wind, which can travel long distances and start new patches. If your neighbor’s roof is covered in moss, spores might blow onto your property and cause moss to grow there, too. It’s a good idea to keep an eye on and control moss growth around your home, as it can affect how your house looks and may damage roofing materials over time.
Why Is It Important to Remove Moss from The Roofs?
While it may seem harmless, moss functions like a sponge, absorbing rainwater and keeping it against your roof tiles. This persistent moisture can lead to numerous issues:
Tile damage: Water held in moss can freeze in cold weather, expand, and cause tiles to crack, delaminate, or break, increasing the risk of water leaks.
Clogged gutters: Dislodged moss can fall into gutters, causing blockages. These obstructions can cause gutters to overflow, resulting in water damage to your home’s foundation and walls.
Additional weight: Water-saturated moss layers can unexpectedly weigh down your roof, adding unnecessary stress to its structure.
Pest problems: The damp conditions fostered by moss and algae growth can attract insects and pests, making your roof an inviting habitat.
Step-by-Step Guide to Removing Roof Moss
If you’re considering giving it a shot, it’s time to prepare. Remember, this isn’t a quick five-minute task, and you’ll be working at height. Prioritize safety at all times.
Safety Precautions
We cannot emphasize enough how hazardous it is to climb onto a roof.
Use a reliable ladder: Ensure it is in excellent condition and set firmly on stable, even ground. For extra safety, have someone hold it while you climb.
Dress appropriately: Wear non-slip, durable shoes. Gloves will protect your hands, and safety goggles are crucial to shielding your eyes from airborne particles and debris.
Monitor the weather: Avoid climbing if it’s windy, wet, or icy outside. The best conditions are a clear, calm, and overcast day.
Tools and Materials Required
You won’t need anything overly complicated, but having the appropriate tools will simplify the process and enhance safety.
- A durable ladder, a garden hose equipped with a spray nozzle
- A long-handled brush with soft bristles (avoid using a wire brush)
- A trowel or plastic scraper for removing thick moss clusters
- A bucket, and a roof-specific moss killer (biocide treatments are advisable)
- Remember to wear safety gear like gloves, goggles, and slip-resistant shoes
Step-By-Step Instructions
Clear Away the Large Clumps: Start by removing the biggest moss clumps by hand using a trowel or a plastic scraper. These tools help lift the moss without damaging the roof tiles. Collect the debris in a bucket to prevent it from falling into your gutters, which could cause clogs.
Moisten the Affected Areas: After removing the large clumps, lightly spray the remaining mossy areas with a garden hose on a low-pressure setting. Avoid high pressure to prevent roof damage and spore spread. Damp moss is easier to remove and helps reduce spore spreading.
Apply a Quality Moss Killer or Remover: Choose a moss killer suitable for your roof type and follow the instructions. Spray it evenly on the moss and let it sit for the recommended time. This kills the moss and loosens it from the tiles. Protect nearby plants with tarps or plastic sheets during this step.
Gently Scrub the Tiles: Once the moss killer has done its job, use a soft brush to scrub off any remaining moss. Start from the top of the roof and work down to prevent loose moss from falling onto already cleaned areas. Don’t use a pressure washer, as it can damage the tiles and cause leaks.
Thoroughly Rinse the Roof: Finally, rinse the entire roof with a hose, starting from the top and working downward. This removes leftover moss and cleaning solution, restoring the roof’s appearance and protecting its condition.
Conclusion
Removing moss from your roof is essential for maintaining its structural integrity and appearance. By following proper cleaning techniques, using appropriate safety precautions, and applying effective moss-removal solutions, you can ensure your roof remains in top condition for years to come. Own Restoration is an expert roofer in Lexington that provide all roofing services.
Regular maintenance and prompt action at the first signs of moss growth will help prevent extensive damage and costly repairs. Remember, patience and consistency are key to achieving a clean, moss-free roof that enhances your property’s value and curb appeal.