
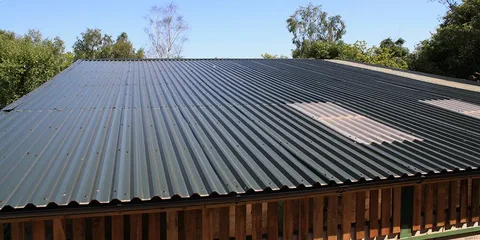
To overlap corrugated metal roofing correctly, start at the bottom corner opposite the prevailing wind, overlap panels sideways by at least one full ridge, and overlap panels vertically by 6–12 inches depending on roof pitch. Always ensure the upper panel sits on top of the lower panel, use proper fasteners with rubber washers, and apply sealant or butyl tape on low-slope roofs for maximum waterproof protection.
Corrugated metal roofing has become one of the most popular roofing materials in America. It’s durable, affordable, energy-efficient, and surprisingly easy to install, if you do it correctly. One of the most important parts of installation is learning to overlap corrugated metal roofing properly.
If you overlap panels the wrong way, you can end up with leaks, wind damage, rust issues, and long-term structural problems. If you do it correctly, you’ll have a watertight, long-lasting roof that can handle heavy rain, snow, and high winds.
In this detailed guide, you’ll learn exactly how to overlap corrugated metal roofing step by step, including side laps, end laps, slope considerations, fastening tips, sealing methods, and common mistakes to avoid.
By the end of this article, you’ll understand how proper overlapping works and how to ensure your corrugated metal roof performs at its best.
Why Overlapping Corrugated Metal Roofing Is So Important
Corrugated metal panels are designed with ridges and grooves that allow water to flow downward. However, these panels are not single continuous sheets across the entire roof. Instead, they are installed in sections.
Because of this, overlapping becomes critical.
Proper overlap ensures:
- Water drains correctly without penetrating seams
- Wind cannot lift the panels
- Snow does not back up under the roofing
- The roof maintains structural integrity
- Rust and corrosion are minimized
Improper overlapping is one of the most common reasons metal roofs leak.
Understanding Corrugated Metal Roofing Panels
Before learning how to overlap corrugated metal roofing, you should understand how these panels are structured.
Corrugated metal sheets feature repeating ridges and valleys. The ridges add strength and help guide water flow. The valleys allow fast drainage.
There are two main types of overlaps in corrugated roofing:
- Side lap (horizontal overlap between panels placed next to each other)
- End lap (vertical overlap where one panel overlaps another panel below it)
Both are critical for waterproofing.
How Much Should Corrugated Metal Roofing Overlap?
The amount of overlap depends on roof pitch (slope) and manufacturer guidelines. However, general recommendations in the United States are:
Side lap overlap:
- At least one full corrugation ridge
End lap overlap:
- 6 inches for roofs with 4:12 pitch or steeper
- 8 to 12 inches for low-slope roofs
For very low slopes, additional sealant may be required.
Always check manufacturer instructions first, but these measurements are standard best practices.
Step-by-Step Guide: How to Overlap Corrugated Metal Roofing
Now, let’s go through the full installation process, focusing specifically on overlapping.
Step 1: Start at the Correct Corner
Begin installation at the lower edge of the roof on the side opposite the prevailing wind direction. This prevents wind-driven rain from getting under seams.
Work upward and across the roof.
Step 2: Install the First Panel
Place your first panel at the bottom corner of the roof.
Make sure:
- It is square with the roofline
- It overhangs the eave slightly (typically 1–2 inches)
- It is aligned properly before fastening
Secure it loosely at first so adjustments can be made.
Step 3: Overlap the Second Panel Sideways
When placing the second panel next to the first, overlap it side-to-side by at least one full corrugation ridge.
This means one raised rib of the new panel sits directly on top of the last raised rib of the installed panel.
The ridges are designed to interlock. Proper alignment ensures water flows down and away from seams.
Never overlap in a way that creates an upward-facing seam.
Step 4: Secure the Side Lap Correctly
Fasten screws through the high ridges (not the valleys) unless the manufacturer’s instructions say otherwise.
Place fasteners:
- Every 12–24 inches, depending on wind zone
- Along the overlapping ridge
- Into solid framing or purlins
Using rubber washer screws is essential for waterproof sealing.
Step 5: Install Additional Panels across the Roof
Continue overlapping panels sideways across the roof row.
Each new panel must:
- Maintain consistent side overlap
- Stay aligned with the roofline
- Be checked for straightness before fully tightening screws
Accuracy in the first row is critical because mistakes multiply as you move upward.
Step 6: Begin the Second Row (End Lap Overlap)
Once the first horizontal row is complete, move up the roof to begin the next row.
Here’s where vertical overlapping happens.
The upper panel should overlap the lower panel by:
- 6 inches minimum on steeper roofs
- 8–12 inches on low slopes
This overlapping method is often referred to as overlapping lengthwise across vertical sections.
Make sure the upper sheet sits on top of the lower sheet, not underneath it. Water must flow over the seam, not into it.
Step 7: Seal the End Lap for Extra Protection
For added protection, especially on lower slopes, apply:
- Butyl tape between overlapping panels
- Roofing sealant along the seam
This is particularly important in regions with heavy rain or snow.
Step 8: Fasten the End Lap Securely
Install screws along the overlapping section.
Make sure:
- Screws are evenly spaced
- Panels are tightly secured
- Washers are compressed properly but not over-tightened
Over-tightening can damage washers and cause leaks later.
Step 9: Continue Up the Roof
Repeat the process:
- Complete each horizontal row
- Move upward
- Overlap vertically
- Seal as needed
Always ensure each new row overlaps the row below it.
Water flows downward, your overlap must always follow gravity.
Roof Pitch and Overlapping Considerations
Roof pitch plays a major role in determining overlap requirements.
Steeper roofs shed water quickly, so shorter end laps are acceptable.
Low-slope roofs require:
- Larger end laps
- Sealant application
- More frequent fasteners
If you’re unsure about your pitch requirements, consulting a professional roofing contractor like Own Restoration LLC can help ensure compliance with local codes and weather demands.
Common Mistakes When Overlapping Corrugated Metal Roofing
Many roofing problems come from small installation errors. Here are mistakes to avoid:
- Overlapping less than one full corrugation ridge
- Installing panels against the prevailing wind direction
- Failing to use sealant on low-slope roofs
- Using incorrect fasteners
- Over-tightening screws
- Misaligning the first panel
Even a slight misalignment can cause panels to shift, creating visible gaps.
Should You Overlap More Than One Ridge?
In high-wind areas, some installers overlap multiple corrugation ridges for extra protection.
However, standard practice is to use one full ridge unless the manufacturer’s instructions say otherwise.
Too much overlap wastes material and may affect alignment.
Always follow product specifications.
Fastener Placement and Its Role in Overlap Integrity
Fasteners are just as important as the overlap distance.
Use:
- Galvanized or coated screws
- Neoprene washer screws
- Screws long enough to penetrate framing
Never use plain nails. They loosen over time, compromising the seam.
Fastener placement along overlapping ridges strengthens the connection between panels.
How Weather Impacts Corrugated Metal Overlaps
Weather conditions influence installation techniques.
In snowy climates:
- Increase end lap overlap
- Use sealant
- Ensure strong fastening
In hurricane-prone regions:
- Add extra fasteners
- Consider wind-rated panel systems
In rainy regions:
- Use butyl tape
- Ensure clean, debris-free seams
Proper overlapping is your first defense against the elements.
Maintenance Tips after Installation
Once installed, proper maintenance helps preserve the integrity of your overlap.
- Inspect seams annually
- Check for loose screws
- Reapply sealant if needed
- Remove debris build-up
Corrugated metal roofing can last 40–60 years when installed and maintained properly.
DIY vs. Professional Installation
While overlapping corrugated metal roofing is manageable for experienced DIYers, mistakes can be costly.
Professionals ensure:
- Correct measurements
- Proper pitch evaluation
- Accurate overlapping
- Secure fastening
Improper overlap is one of the most common causes of metal roof leaks.
If your roof is large, steep, or complex, hiring a professional is strongly recommended.
Frequently Asked Questions
How much should corrugated metal roofing overlap?
Corrugated metal roofing should overlap at least one full ridge length horizontally and 6–12 inches vertically, depending on the roof pitch.
Do you need sealant between corrugated metal roof panels?
Sealant is recommended for low-slope roofs or areas with heavy rainfall. Butyl tape improves waterproofing at overlaps.
Which direction should corrugated metal roofing overlap?
Panels should overlap away from the prevailing wind direction to prevent wind-driven rain from entering seams.
Can you overlap corrugated metal roofing too much?
Yes, excessive overlap wastes material and can affect panel alignment. One ridge to the side and a proper end lap are usually sufficient.
What happens if corrugated metal roofing is not overlapped correctly?
Improper overlap can cause leaks, rust, panel lifting in high winds, and long-term structural damage.