
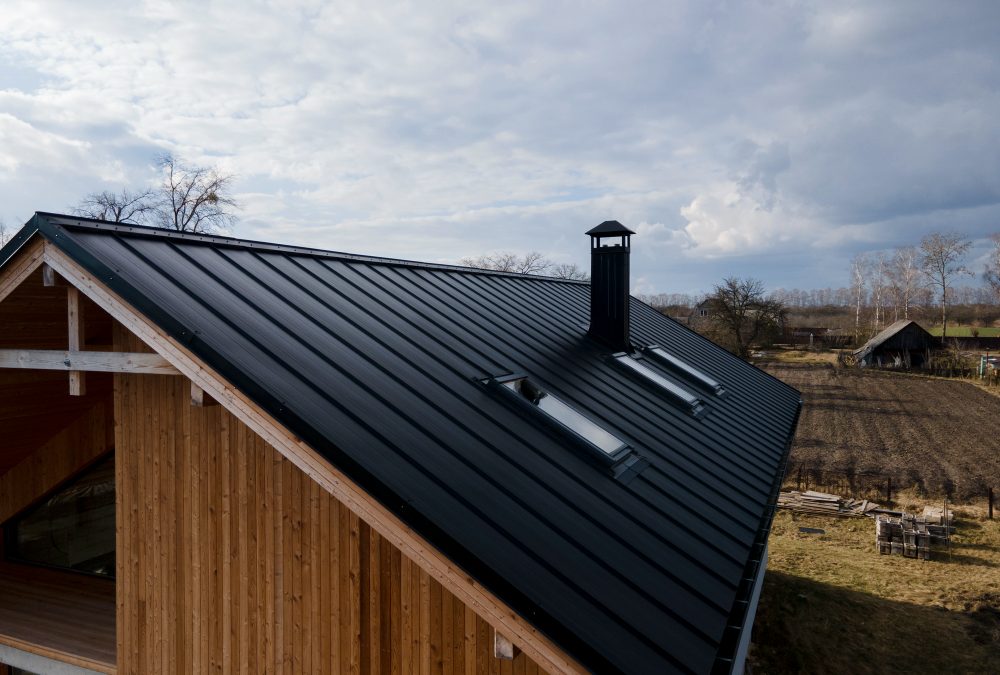
To install metal roofing, measure the roof accurately, install synthetic underlayment, secure drip edge flashing, align and fasten metal panels correctly, overlap panels properly, and seal all flashing and ridge caps. Proper installation ensures long-term durability, leak prevention, and energy efficiency.
Metal roofing has become one of the most popular roofing systems in the United States due to its durability, energy efficiency, and modern appearance. Homeowners love its long lifespan, minimal maintenance requirements, and ability to withstand harsh weather conditions. If you’re researching how to install metal roofing, this comprehensive guide will walk you through the entire process, from preparation to final inspection.
Installing metal roofing requires precision, safety awareness, and the right tools. While many homeowners hire professionals for installation, understanding the process helps you make informed decisions and ensure high-quality workmanship.
Why Choose Metal Roofing?
Before diving into the installation process, it’s important to understand why metal roofing is a strong investment.
- Lifespan of 40–70 years
- Excellent wind and fire resistance
- Energy efficiency through heat reflection
- Low maintenance requirements
- Lightweight compared to tile or slate
- Environmentally friendly and recyclable
With proper installation, a metal roof can outperform traditional asphalt shingles in both durability and long-term cost efficiency.
Types of Metal Roofing Systems
There are two primary styles commonly installed in residential properties:
Standing Seam Metal Roofing
This system features raised seams that interlock vertically. It has concealed fasteners and a sleek, modern look.
Corrugated or Ribbed Metal Panels
These panels are more traditional and often used for barns, sheds, and residential roofs. Fasteners are exposed but properly sealed.
The installation process may vary slightly depending on the style you choose.
Tools and Materials Needed
Proper preparation ensures a smooth installation process. Gather the following:
- Metal roofing panels
- Roofing screws with neoprene washers
- Synthetic underlayment
- Drip edge flashing
- Ridge cap
- Closure strips
- Metal snips or power shears
- Measuring tape
- Chalk line
- Screw gun or drill
- Ladder and safety harness
- Gloves and eye protection
Having high-quality materials is critical for long-term performance.
Safety Precautions Before Starting
Roofing projects can be dangerous. Follow these safety tips:
- Use a sturdy ladder placed on stable ground
- Wear non-slip footwear
- Use a safety harness on steep roofs
- Avoid working in wet or windy conditions
- Wear gloves to protect against sharp metal edges
If you’re unsure about handling heights or heavy panels, consult a professional roofing company like Own Restoration LLC for expert installation.
Step 1: Measure the Roof Accurately
Accurate measurements are essential to avoid material waste or shortages.
- Measure the length and width of each roof section
- Calculate total square footage
- Account for roof pitch
- Add 10% extra material for overlaps and waste
Proper planning ensures efficient installation.
Step 2: Remove Old Roofing (If Necessary)
In many cases, metal roofing can be installed over existing shingles. However, removing old materials may be recommended if:
- Shingles are severely damaged
- The roof deck is rotting
- Local building codes require removal
Inspect the roof deck thoroughly and replace any damaged plywood before proceeding.
Step 3: Install Underlayment
Underlayment provides an additional moisture barrier.
- Roll out synthetic underlayment horizontally
- Overlap each layer by at least 4 inches
- Secure using roofing cap nails
- Ensure a flat, wrinkle-free surface
This step is critical for preventing leaks and condensation issues.
Step 4: Install Drip Edge Flashing
Drip edge flashing directs water away from the fascia and foundation.
- Install along the roof edges
- Secure with roofing nails
- Overlap sections by 2 inches
- Ensure alignment is straight
This helps protect the roof structure from water damage.
Step 5: Start Installing Metal Panels
Begin installation at the bottom corner of the roof, working upward and across.
- Align the first panel carefully
- Ensure it overhangs slightly at the eave
- Secure using manufacturer-recommended screws
- Drive screws straight, not at an angle
- Do not over tighten fasteners
Proper alignment of the first panel determines the accuracy of the entire installation.
Step 6: Overlap Panels Correctly
Each new panel should overlap the previous one.
- Follow manufacturer overlap guidelines
- Ensure seams are tightly aligned
- Install screws along rib lines
- Maintain consistent spacing
Incorrect overlapping can lead to leaks and structural issues.
Step 7: Install Flashing Around Penetrations
Roof penetrations, such as vents, chimneys, and skylights, require special attention.
- Install boot flashing around pipes
- Seal edges with roofing sealant
- Secure flashing tightly
- Ensure water flows away from penetrations
Flashing errors are one of the most common causes of roof leaks.
Step 8: Install Ridge Cap
The ridge cap seals the roof’s peak.
- Place closure strips along the ridge
- Position the ridge cap over the strips
- Secure with screws at recommended intervals
- Ensure proper ventilation if applicable
This finalizes the roof’s structural seal.
Step 9: Inspect the Entire Roof
After installation:
- Check for loose screws
- Ensure panels are aligned
- Confirm flashing is sealed
- Remove metal debris
- Clean the surface
A thorough inspection prevents future issues.
Common Installation Mistakes to Avoid
- Over-tightening screws
- Incorrect panel alignment
- Insufficient overlap
- Skipping underlayment
- Improper flashing installation
- Ignoring ventilation requirements
Attention to detail ensures a leak-free, long-lasting roof.
How Long Does It Take to Install Metal Roofing?
Installation time depends on:
- Roof size
- Roof complexity
- Number of installers
- Weather conditions
A standard residential roof may take 2 to 4 days for professional installation.
Cost of Installing Metal Roofing
Metal roofing installation typically costs between $8 and $16 per square foot installed. The total cost depends on material type, labor rates, and roof complexity.
DIY installation may reduce labor expenses but requires skill and safety awareness.
Maintenance After Installation
To maximize lifespan:
- Inspect the roof twice annually
- Clean debris regularly
- Check fasteners after storms
- Reapply sealant if needed
- Address minor issues quickly
Proper maintenance extends durability for decades.
Benefits of Professional Installation
While DIY installation is possible, professional contractors ensure:
- Proper alignment
- Code compliance
- Manufacturer warranty protection
- Safe installation
- Efficient completion
Professional installation often prevents costly future repairs.
Final Thoughts
Learning how to install metal roofing helps homeowners understand the complexity and precision required for a durable result. From accurate measurements and underlayment installation to proper panel alignment and flashing, every step matters.
Metal roofing offers exceptional durability, energy efficiency, and modern appeal. When installed correctly, it can last 40 to 70 years or more. Whether you choose a DIY approach or hire professionals, attention to detail is key to a successful project.
Frequently Asked Questions
Can you install metal roofing over shingles?
Yes, metal roofing can often be installed over existing shingles if the roof deck is structurally sound and local building codes allow it.
Do metal roofs require special underlayment?
Yes, synthetic underlayment is recommended to provide moisture protection and enhance durability.
How far apart should screws be on metal roofing?
Screw spacing typically ranges from 12 to 24 inches, depending on manufacturer guidelines and panel type.
Is installing metal roofing difficult?
Metal roofing installation requires precision and safety precautions. While possible for experienced DIYers, professional installation is often recommended.
How long does metal roofing last after installation?
When installed correctly and properly maintained, metal roofing can last between 40 and 70 years.